You make one image of your character and it looks great. The hair is right, the outfit is right, it feels like them. Then you generate again for a second pose, and a slightly different person shows up wearing the same jacket. Anyone making comics, reference sheets, fan art, VTuber assets, or a recurring OC runs into this, and it is the main thing standing between a one-off picture and a character you can actually reuse.
The fix is not some secret prompt. It comes down to giving PixAI more to work with than a line of text, and there are three ways to do that, all on the same screen.
This guide walks through them as one workflow, from your first reference image to a trained character model, with the exact prompts and settings you can copy as you go. You can open PixAI in another tab if you want to follow along.
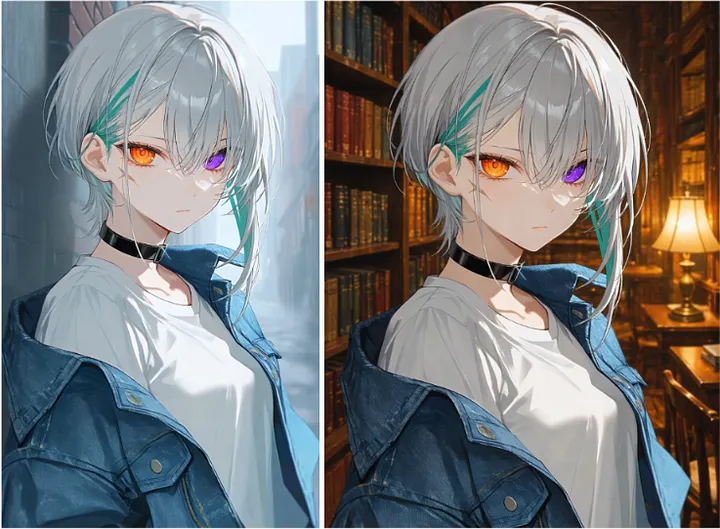
 |
| The same character across three scenes, all generated in PixAI. |
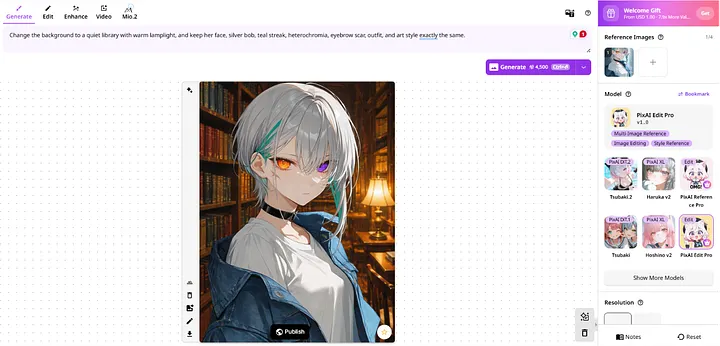
Prompt (base look, left, model used Tsubaki.2 ): A teenage anime girl with a short asymmetrical silver bob and a single teal streak over her left eye, heterochromia with an amber left eye and a violet right eye, a small scar across her left eyebrow, wearing an oversized washed-denim jacket over a plain white tee and a black choker.
What Causes Character Inconsistency in AI Art?
There is really one root cause, and everything else is a version of it. The model does not store your character. Every time you hit generate, it draws a brand new person from scratch and treats your prompt as a rough guide. A prompt like "silver hair, blue eyes, hoodie" matches millions of possible faces, so the model decides the eye shape, the exact shade of silver, the jawline, and a hundred other details on its own, and it decides them differently each time.
Part of that you cannot remove. The model samples a fresh result on every run, and the random seed shifts even when the prompt and model stay the same, so two clicks of an identical setup still give you two slightly different faces. That randomness is normal, and it is exactly why the methods below exist.
What you can control is how much room you leave the model to fill in. These habits quietly widen that gap:
Editing the prompt between images. Small rewrites, like "smiling" one time and "soft smile" the next, or reordering your tags, nudge the model toward different faces.
Changing the composition. A close-up, then a full-body shot, then a side profile gives the model an excuse to redraw the face for each new framing.
Describing the outfit loosely. Leave clothing vague and the model invents collars, colors, and accessories that were never in your design.
Switching base models mid-project. Tsubaki.2, Serin, and the SDXL models each draw faces their own way, so changing model is one of the fastest ways to change your character.
The pattern is always the same. The less your character is pinned down, the more the model makes up. So the fix is always the same too. You give it something firmer than text to hold onto, whether that is a reference image, a trained LoRA, or a prompt detailed enough to leave almost nothing to chance. Those are the three methods, and the rest of this guide puts them to work.
PixAI Features That Help Maintain Character Consistency
PixAI keeps all of these tools on one generation screen, so you can mix them without jumping between apps. Here is the quick map before we get into each one.
Reference Pro is image-to-image editing you drive with plain language. You upload one clear picture of your character, choose what to keep locked, and describe only what should change. It is the quickest way to make new images of a character you already have, and for most people it is the right place to start. PixAI covers it in detail in its Reference Pro guide.
Character LoRA is a small add-on model you train on fifteen to hundred pictures of your character. Once it is done, you switch it on and every generation already knows who they are, with no reference image and no re-describing the face. It is the most consistent option for anyone drawing the same character again and again, and the full process is in the Train LoRA on PixAI guide.
Edit Pro is the precision tool. It follows multi-step instructions, takes up to four reference images at once, renders clean text, and keeps both the character and the art style steady across edits, so it is the one you reach for when a single image needs a careful fix.
Consistent prompting runs underneath all three. A detailed, reusable description block plus one locked base model narrows the range of faces the model can produce, and it makes every other method work better.
Not sure where to start? If you already have one good image of your character, begin with Reference Pro. If you know you will draw them more than twenty times, or you are building a comic or VTuber asset for the long haul, train a Character LoRA. Use Edit Pro whenever a single image needs fixing instead of regenerating.
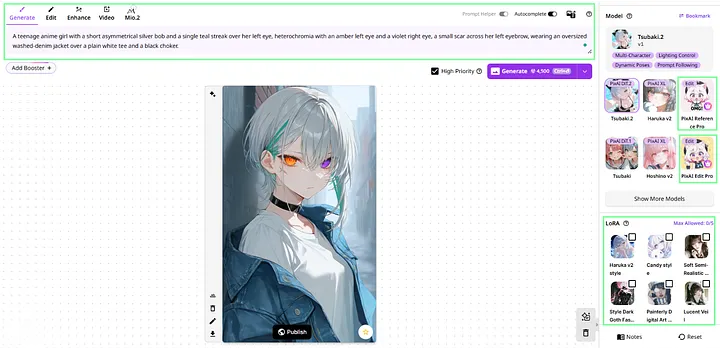 |
| All of these tools are on the same PixAI generation screen. |
Reference Pro is where almost everyone should start, because it needs very little from you and gives back a lot. You hand the model one clear image of your character, and instead of describing them all over again, you only describe the new scene. The reference carries the identity, so the model can focus on the pose and background you actually want to change.
When to use it. Reach for Reference Pro when you have one strong image and want more of the same character in new poses, expressions, and settings. It is great for the first ten to twenty images, and it is the easiest way to feel what consistency is actually like.
How it works. Switch the generator to Reference Pro mode and upload a clear, bright image, ideally front-facing or three-quarter view. Pick a base model that suits your style: Tsubaki.2 for natural-language anime work, Serin for Korean-style art, or Otome V2 for high-quality male characters. Set the face and outfit locks high, leave pose and background free, and write a prompt that only covers what changes.
Strengths and limits. Setup takes about thirty seconds, and the results stay close across a lot of generations from the same source. The one thing that trips people up is image quality. A small, dark, or back-of-head reference gives the tool almost nothing to lock onto, so a clear, well-lit front or three-quarter shot saves you most problems before they start.
 |
| One reference image, a brand new scene, the same character. |
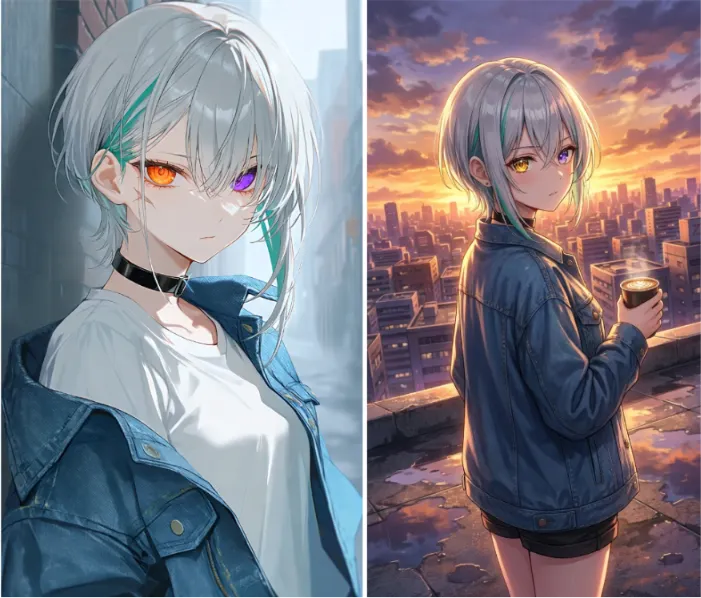 |
| Reference Image (left), generated image (right) |
Workflow #2: Training a Character LoRA
Reference Pro is excellent, but it always reads identity from an external image, which means there is a ceiling to how locked-in your character can be. When you plan to draw the same character dozens of times, a Character LoRA raises that ceiling, because the character becomes part of the model itself rather than an attachment to it.
When Reference Pro is not enough. If you are producing a webcomic, a series of fan art, or a VTuber model, you will generate the same face for weeks or months. At that scale, turning on a LoRA and getting the right character automatically beats uploading a reference every single time, and the consistency is noticeably higher.
The basic workflow. Gather images of your character (100 max) that vary in pose, angle, and expression while keeping the outfit recognizable and the backgrounds simple. Choose one unused trigger word so it does not collide with existing knowledge in the model, then train on the same base model you generate with. That last point is the golden rule of LoRA training on PixAI: a LoRA trained on Tsubaki.2 performs best on Tsubaki.2, and switching bases later tends to degrade the result. SDXL training finishes in roughly fifteen to thirty minutes, while a DiT model like Tsubaki.2 takes around seventy minutes, and membership plans include monthly training quotas with a discount for reusing a dataset.
The bootstrap bridge. Many creators hit an obvious snag: they want a LoRA but do not yet have twenty images of a character who only exists in their head. The clean solution chains Workflow 1 into Workflow 2. Take your single best image, generate roughly twenty variations through Reference Pro, hand-pick the fifteen that hold the likeness best, and use those as your training set. Reference Pro becomes the on-ramp that fills your LoRA dataset.
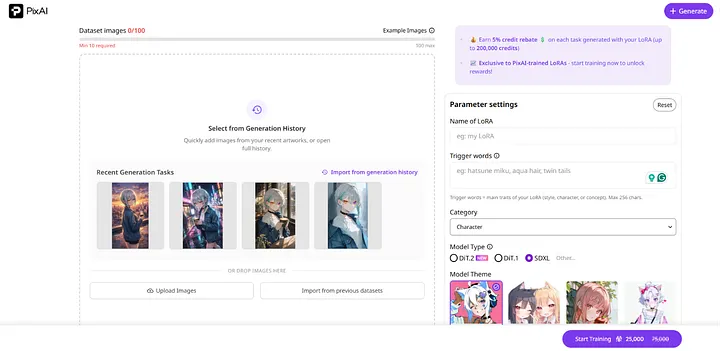 |
| Match your training base to your generation base. |
Workflow #3: Refining Results with Edit Pro
Even with a strong reference or a trained LoRA, individual images occasionally drift. An eye lands on the wrong color, a scar disappears, or an accessory goes missing. Regenerating the whole image risks losing a composition you liked, and this is precisely where Edit Pro earns its place as the refinement layer in the workflow.
Edit Pro reads the structure of an image deeply and follows multi-step instructions written in plain language, so you can describe a targeted fix and it will apply only that change while preserving the rest. Because it maintains character identity and art style across edits, your correction does not quietly redraw the face you were trying to protect. It also accepts up to four images at once, which makes it the natural tool for combining a character with a separate outfit reference or placing two characters into one scene.
Correcting details and facial features. When a generation is close but a feature slipped, tell Edit Pro exactly what to repair and what to leave alone.
 |
| Original scene beside the edited one, so the identity match is obvious. |
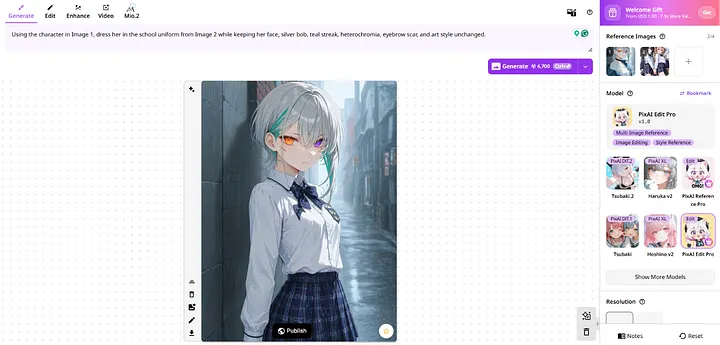
This one needs a second reference image for the outfit, so treat it as a bonus. If you want it, give Edit Pro Image 1 (the image we created in the beginning) and a uniform as Image 2:
Prompt: Using the character in Image 1, dress her in the school uniform from Image 2 while keeping her face, silver bob, teal streak, heterochromia, eyebrow scar, and art style unchanged.
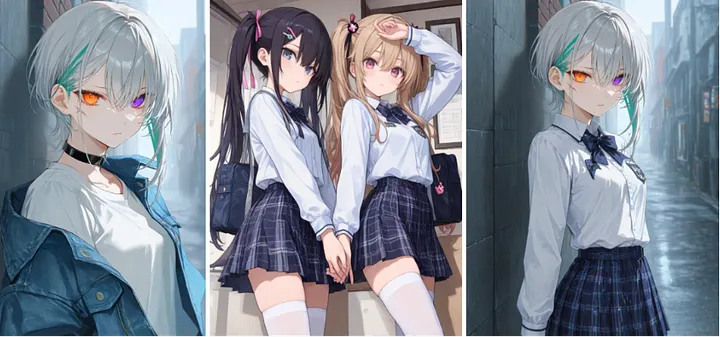 |
| Two references in, one outfit swap out. |
Best Practices for Long-Term Character Consistency
The three workflows are strongest when you treat them as one system rather than three separate buttons. A few habits keep a character recognizable across an entire project.
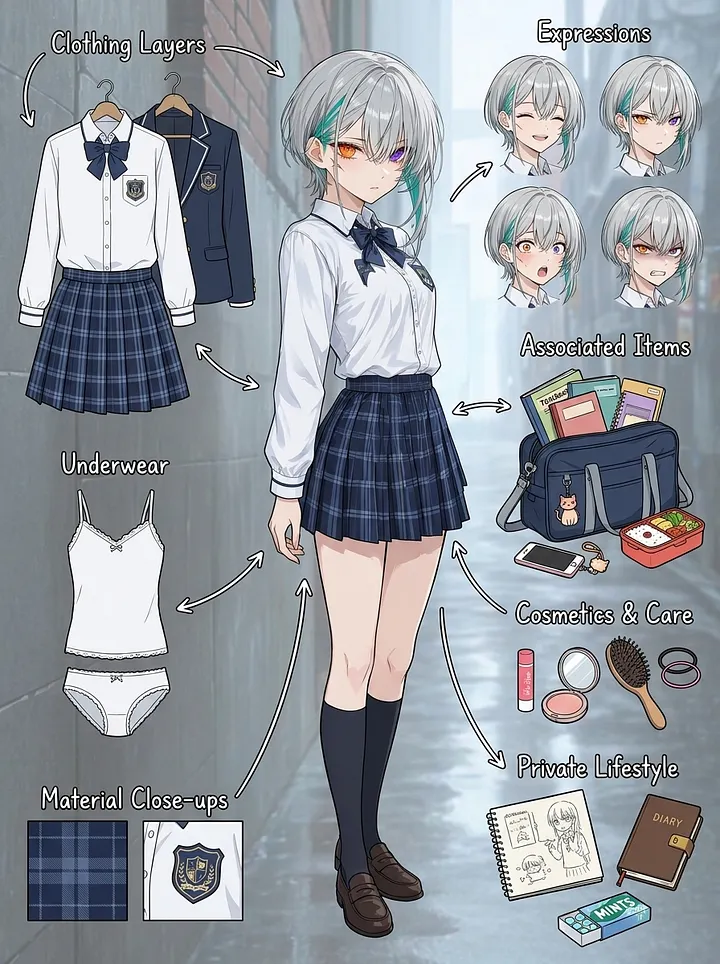
Build a character sheet first. Before you generate at scale, lock down a single reference sheet that breaks your character into labeled parts you can check every later image against. The fastest way is the Character Sheet generator in the PixAI Toolbox, an Outfit and Detail Breakdown tool that turns one image into a clean design sheet without any prompt writing. You upload a clear, evenly lit image of your character on a simple background, choose the language you want the labels in, and click Generate. It returns a breakdown of the outfit, accessories, and details that becomes your source of truth for the whole project.
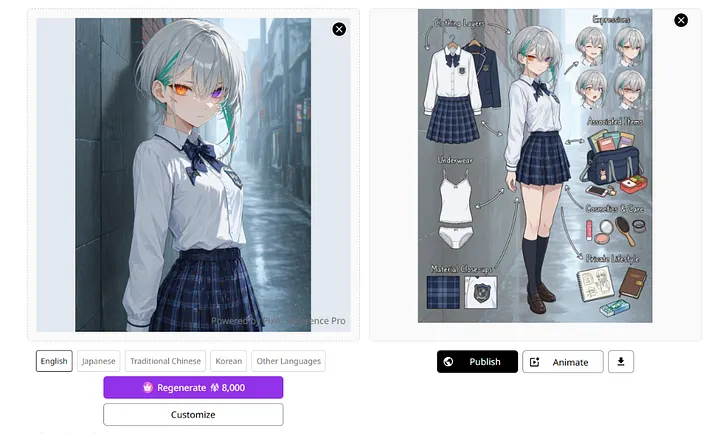
Open the Character Sheet generator, upload your base hero image, pick your label language, and hit Generate. No prompt needed. Use a clean, evenly lit version on a simple background so the breakdown comes out crisp.
Reuse a prompt block and lock your base model. Save a detailed description of twelve to twenty specific traits and paste it at the start of each generation, then add only the new scene. Pick one base model at the beginning and stay on it until the project ends, because mixing model families mid-series reliably breaks the face.
Combine Reference and LoRA. These methods are not rivals. Reference Pro gets you moving on day one and seeds the dataset, the LoRA locks identity for the long run, and Edit Pro cleans up whatever slips through. Avoid stacking several LoRAs at once, since a style, character, and outfit LoRA loaded together can distort the face. The LoRA stacking guide covers how to balance them when you do.
Make it repeatable. A fast loop you can run today is to generate four base images and pick one, switch to Reference Pro with face and clothing locked, prompt three new scenes one at a time keeping the two best of each, and you have five consistent images in about fifteen minutes. Those same five make an ideal starter dataset when you graduate to a LoRA. For a beginner-level overview of all three methods side by side, the 3 beginner methods guide is the companion to this workflow.
Conclusion
Character consistency stops feeling like luck the moment you give the model more than text to work with, and PixAI puts all three ways to do that on one screen. Start with Reference Pro to bring an existing image to life across new scenes, train a Character LoRA once you know you will reuse the character often, and keep Edit Pro on hand to repair the occasional drift without losing a good composition. Layer a saved prompt block and a locked base model underneath, and your OC stays recognizable from the first panel to the hundredth.
The best way to get the hang of it is to run it on a character of your own. Open PixAI, make a base image you love, and build out from there. When you want to go deeper on any step, the PixAI documentation lays out the models, prompting, and training in full.